


SUPPORTNew
* When you find it difficult to detach a part, heat it with a hair dryer.
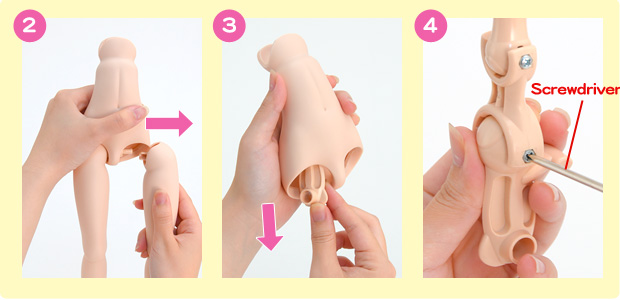
 Detaching “upper / lower arm part” and “thigh part”
① Hold each part as shown in the images above.
② Pull it straight in the direction of the arrow and take it off.
Attaching “upper / lower arm part” and “thigh part”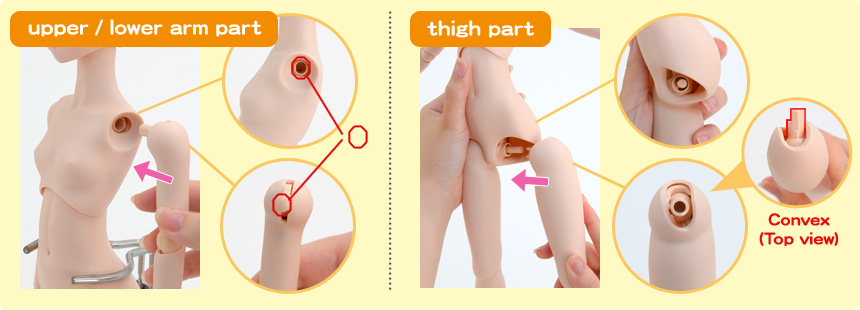
Insert a protruding part into a hole of the internal frame.
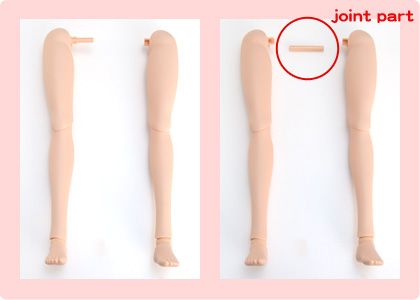
* A joint part is connecting right / left thighs.
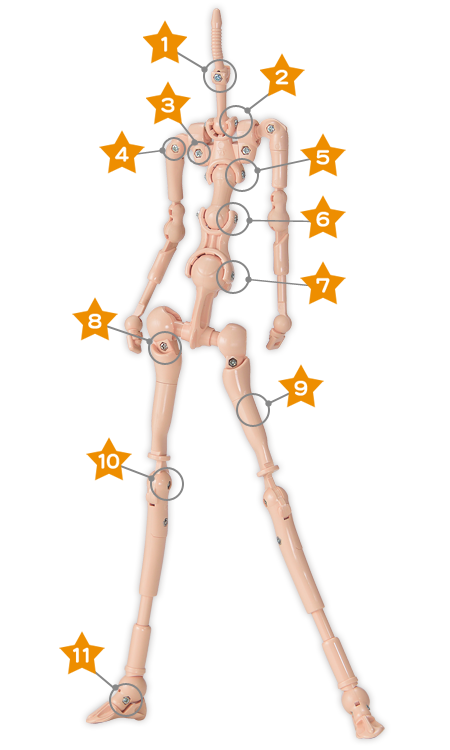
DD-f³ can keep its ideal posing performances for a long time by tightening the screws of the joints.
* Tighten the screws gradually: be careful not to damage the frame by tightening screws too much.
* When you find it difficult to detach a part, heat it with a hair dryer.
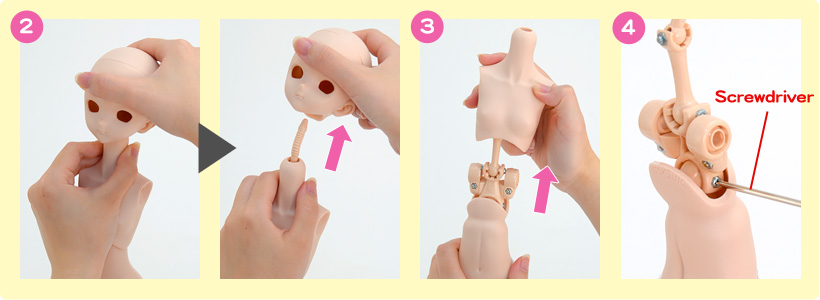
 Neck: the first joint
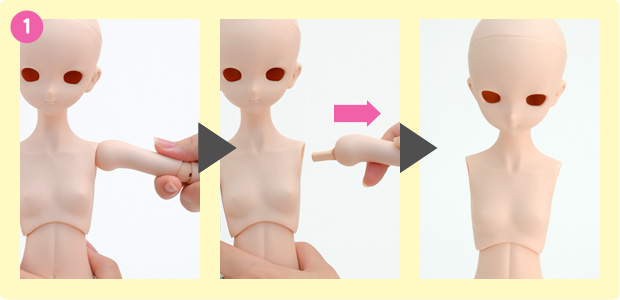
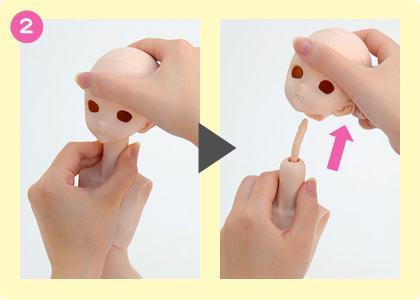
① Take off the both arms.
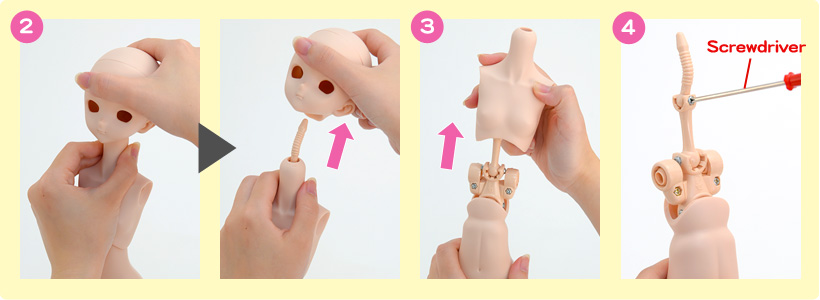
② Take off the head.
* Be careful: the neck shaft is curved. Take off the head while holding the neck firmly.
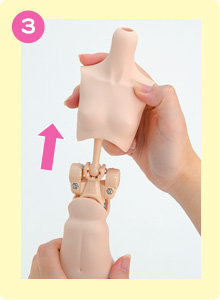
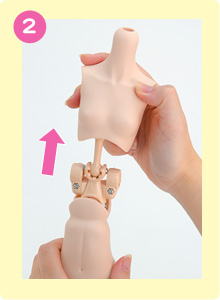
③ Take off the upper torso from the frame.
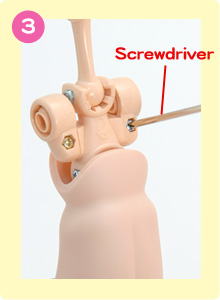
④ Tighten the screw until the neck gets an ideal posing ability.
 Neck: the second joint
① Take off the both arms.
② Take off the head.
* Be careful: the neck shaft is curved. Take off the head while holding the neck firmly.
③ Take off the upper torso from the frame.
* Hold the frame firmly in order not to make it fall out.
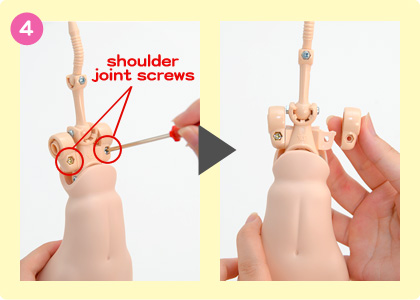
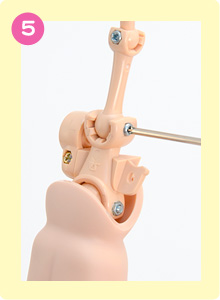
④ Remove the shoulder joint screws and take off the shoulder frames.
⑤ Tighten the screw until the neck gets an ideal posing ability.
 Shoulders: the first joints
① Take off the both arms.
② Take off the upper torso from the frame.
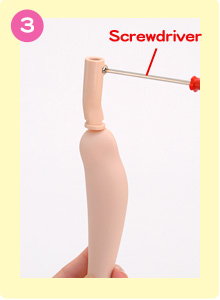
③ Tighten the screws until the shoulders get an ideal posing ability.
 Shoulders: the second joints
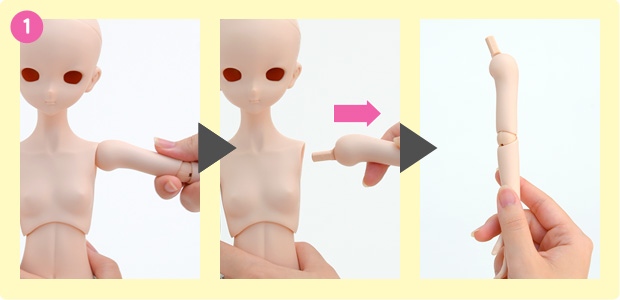
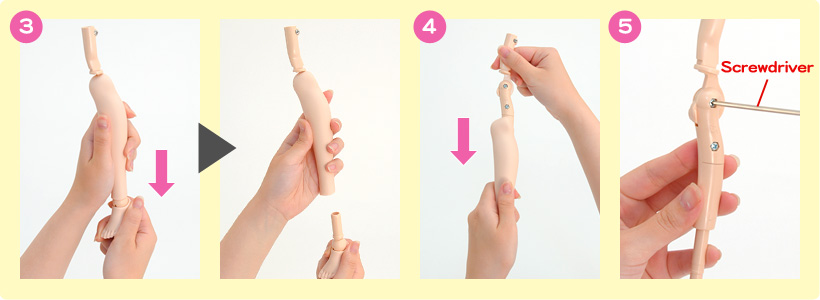
① Take off the both arms.
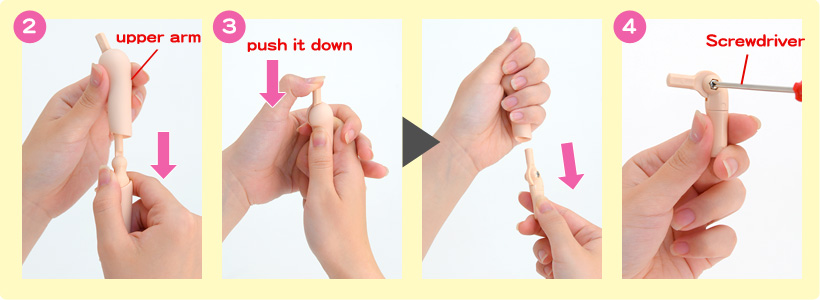
② Take off the lower arm from the upper arm.
③ Push the upper arm frame downward and take it off.
④ Tighten the screws until the shoulders get an ideal posing ability.
 Body: the first joint
① Take off the both arms.
② Take off the head.
* Be careful: the neck shaft is curved. Take off the head while holding the neck firmly.
③ Take off the upper torso from the frame.
④ Tighten the screw until the body gets an ideal posing ability.
 Body: the second joint
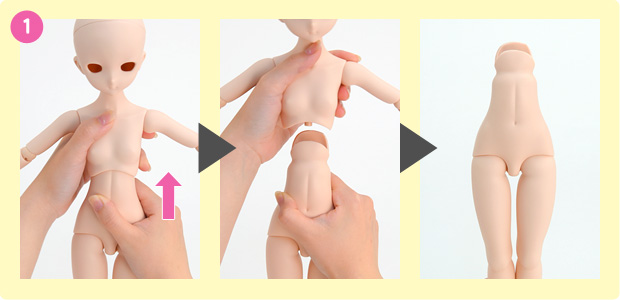
① While holding the lower torso, take off the upper torso together with the frame.
② Take off the both thigh parts.
③ Take the frame out of the lower torso.
④ Tighten the screw until the body gets an ideal posing ability.
 Body: the third joint
① While holding the lower torso, take off the upper torso together with the frame.
② Take off the both thigh parts.
③ Take the frame out of the lower torso.
④ Tighten the screw until the body gets an ideal posing ability.
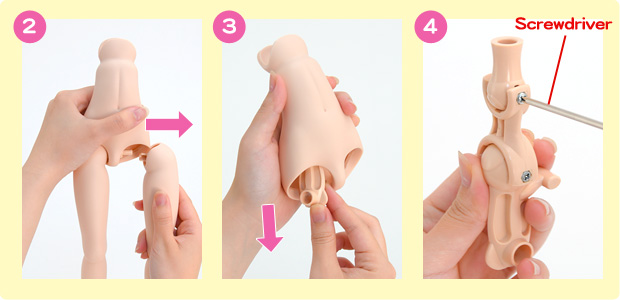
 Hip joints
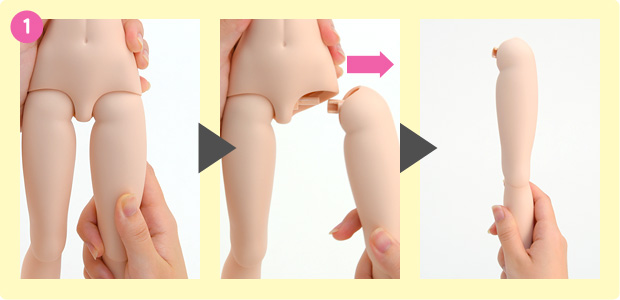
① Take off the thigh part.
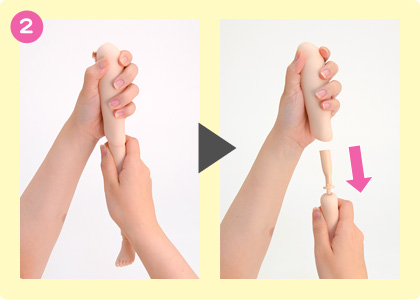
② Take off the shin part together with the frame.
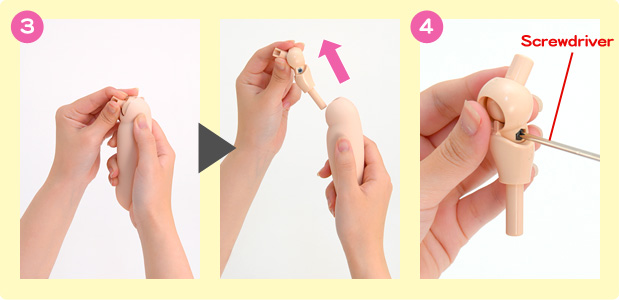
③ Take the frame out of the thigh part.
④ Tighten the screws until the body gets an ideal posing ability.
 Thigh connecting parts
① Take off the thigh part.
② Take off the shin part.
③ Tighten the screws until the thighs get an ideal posing ability.
 Knee joints
① Take off the thigh part.
② Take off the shin part together with the frame.
③ Take off the foot part.
④ Take off the outer part of the shin.
⑤ Tighten the screws until the knees get an ideal posing ability.
 Ankle joints
① Take off the foot part.
② Take off the outer part.
③ Tighten the screws until the ankles get an ideal posing ability.
* Tighten the screws gradually: be careful not to damage the frame by tightening screws too much.
* When you find it difficult to detach a part, heat it with a hair dryer.